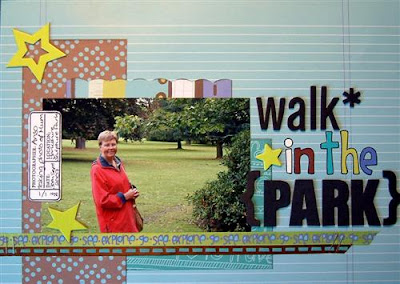
 Please feel free to use these instructions to make your own layout. You are free to link to this page from any forum etc if you wish. Please do NOT copy this information and/or photos to use for your own classes/forums/webpages without permission.
Supplies needed:
Love Elsie – Toby – “Culture”
Love Elsie – Toby – “Thoughts”
Love Elsie – Toby – “Carry On”
Love Elsie – Toby – Big ribbon pack
Love Elsie – Toby – Tiny ribbon pack
Love Elsie – Toby – alphabet cardstock stickers
October Afternoon – Candid Camera stampset
American Crafts – Thickers – Latte, Foam, Black
American Crafts – Thickers – Daiquiri, Foam, Black
American Crafts – Playhouse Chipboard Stars
Also needed:
Glue (I use Herma removable)
Black Slick Writer
Charcoal Chalk Inkpad (optional)
Stapler
Scalloped scissors (optional)
Scrap piece of white cardstock
Start by cutting your patterned paper (“Culture”) to size. I scrap in true A4 size, so I cut mine to 29,7x21 centimetres (cm). Please feel free to adapt to another layout size if you prefer. We will be using the striped side of the paper for the base of the layout.
Also pick your photo. I’m using a standard 15x10 cm (6x4) photo in a landscape format. If you’re working on a bigger sized layout (say 12x12) then a larger photo would also work great.
• 18x7,5 cm piece from “Culture”
• 11x9,5 cm piece from “Thoughts”
• 12x3 cm piece from “Carry On”


2 comments:
Great layout class, Anso! You make it look so easy. )
Anso, Thank you so much for your classes and layouts. You've inspired me to start scrapbooking and get creative again. I lost my mom to suicide 4 years ago and lost all desire for anything creative (I studied fine arts in University). I am now scrapping every day and even joined a few swaps. I have subscribed to the scrap-room (*love* their stuff. I love seeing your pages and have read your entire blog. Feel free to check out my blog too...
Rhonda
Post a Comment